Area:
If you want to make a project in the
terms of modules wise.
Areas are some of the most important
components of ASP.NET MVC projects. The main use of Areas is to physically
partition a web project in separate units. In short, areas can be defined as
smaller functional units in an ASP.NET MVC project with their own set of
controllers, views, and models.
- An MVC application can have any number of Areas.
- Each Area has its own controllers, models and views.
- Physically, Areas are put under separate folders.
- Areas are useful in managing big web applications.
- A web application project can also use Areas from different projects.
Creating Area in MVC:
Right click on project (MVC7AmWarriorBatch)
-> Add -> Area -> Name (Admin) -> Add

This
will add 'admin' folder under Area folder as shown below.

The
following is AdminAreaRegistration class created with admin area.
using System.Web.Mvc;
namespace MvcProject.Areas.Admin
{
public class AdminAreaRegistration :
AreaRegistration
{
public override string AreaName
{
get
{
return "Admin";
}
}
public override void
RegisterArea(AreaRegistrationContext context)
{
context.MapRoute(
"Admin_default",
"Admin/{controller}/{action}/{id}",
new { action = "Index", id = UrlParameter.Optional }
);
}
}
}
Right click on Area ->Add ->
Area -> Name (Employee) -> Add

The
following is EmployeeAreaRegistration class created.
using System.Web.Mvc;
namespace MvcProject.Areas.Employee
{
public class EmployeeAreaRegistration :
AreaRegistration
{
public override string AreaName
{
get
{
return "Employee";
}
}
public override void
RegisterArea(AreaRegistrationContext context)
{
context.MapRoute(
"Employee_default",
"Employee/{controller}/{action}/{id}",
new { action = "Index", id = UrlParameter.Optional }
);
}
}
}
Let us add a controller in Employee area by right click on
Controllers folder, then Add, Controller.
Select MVC 5 Controller - Empty Template and give name like DefaultController.

Create
a view by right click on index method, then Add view, and give name to view
like below

Inside your Index.cshtml add some text
like ‘Hello World’ and build your
application.
The url coming like this

Bundling and Minification:
Minification:
Minification removing of unnecessary
files like white space , : ; is called minification where we compares file into
a small size.
If u want to minify the files it two
ways
1.
Is
manually doing
2.
Take
tool help
Tool help
Go to google chrome -> open google.com
-> online converting javascript to
minified - > then click Javascript Minifier link
Its open url page https://javascript-minifier.com/
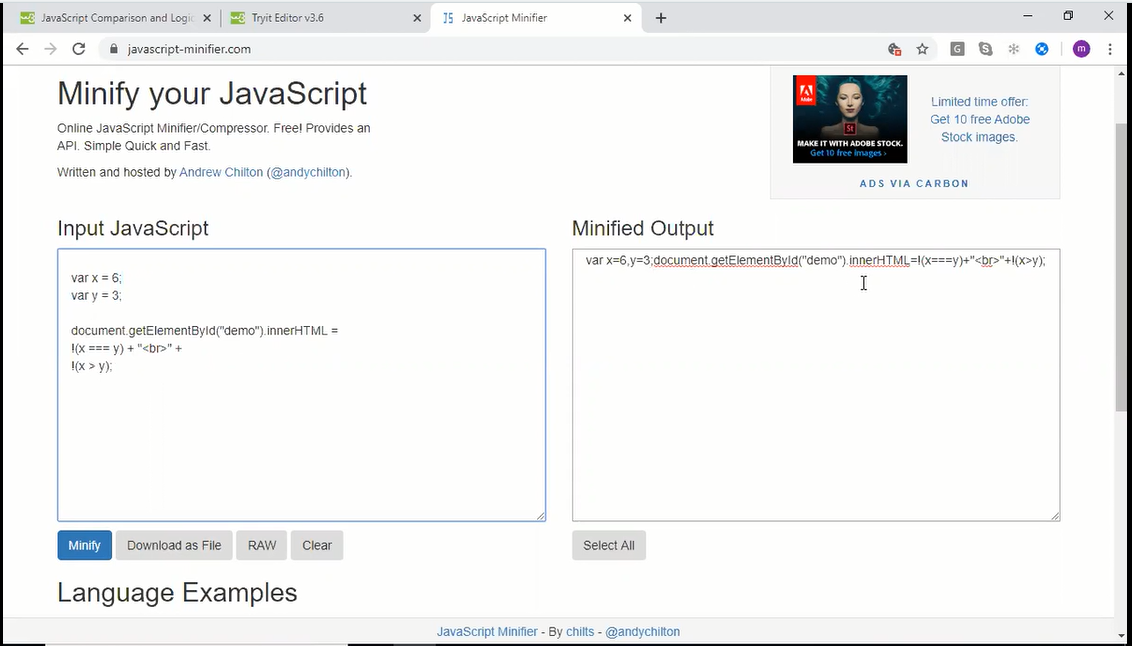
- Minification means its compress large file into small file
- In our project also some minification files are there
- So, go to the Script folder they have bootstrap.js and bootstrap.min.js files are there same code in side two files but sizes are different
- bootstrap.js is not compress file
- bootstrap.min.js is a compress file.

- Implementation purpose we can use bootstrap.js file
- Production time we can use bootstrap.min.js file. We can’t change in bootstrap.min.js file because all code in single line.
Bundling:
Bundling is proses of grouping of
files as a single unit is called bundling.
Right click on Solution explorer
-> Add -> New Project -> ASP.NET Web Application(.Net Framework) using
C# language -> Next -> Project Name(WebApplication) -> Create ->
Mvc -> Create

Project Added like below:

In bundling two types
1.ScriptBundle
2.StyleBundle
ScriptBundle
is responsible for JavaScript minification of single or multiple script files.
StyleBundle
is responsible for CSS minification of single or multiple style sheet files.
In this application App_Start folder
is there in this folder BundleConfig.cs file is there
using System.Web;
using System.Web.Optimization;
namespace WebApplication
{
public class BundleConfig
{
// For more
information on bundling, visit https://go.microsoft.com/fwlink/?LinkId=301862
public static void RegisterBundles(BundleCollection
bundles)
{
bundles.Add(new ScriptBundle("~/bundles/jquery").Include(
"~/Scripts/jquery-{version}.js"));
bundles.Add(new ScriptBundle("~/bundles/jqueryval").Include(
"~/Scripts/jquery.validate*"));
// Use the
development version of Modernizr to develop with and learn from. Then, when
you're
// ready for
production, use the build tool at https://modernizr.com to pick only the tests
you need.
bundles.Add(new ScriptBundle("~/bundles/modernizr").Include(
"~/Scripts/modernizr-*"));
bundles.Add(new ScriptBundle("~/bundles/bootstrap").Include(
"~/Scripts/bootstrap.js"));
bundles.Add(new StyleBundle("~/Content/css").Include(
"~/Content/bootstrap.css",
"~/Content/site.css"));
}
}
}
No comments:
Post a Comment